Prior to leaving to visit my family and in preparation for a driving event, there was a bunch of suspension work done on the Saab. I wanted to stiffen up the damping a little bit without losing ride height or suspension travel, so I got a set of Bilstein HD B6's to use with the stock springs. Some of the bushings & front ball joints were worn too, so those got attention at the same time. These are write-ups that I did for SaabCentral on the various jobs.
After almost 160k miles, plenty of rough MI winters with lots of potholes, and a couple of ice racing events each year, the OEM dampers had thrown in the towel, with the rears especially starting to make that "sucking a milkshake through a straw" noise. I eventually decided to go with the B6 over the B4 or another OEM replacement to help with body roll & motion during a track day coming up in a couple months, plus I liked how solidly built they are. No first impressions yet, but here's the journey for installing them. Sorry for the lack of pictures removing the front struts, I forgot to take them until it was too late.
Removing the front McPherson struts is pretty straightforward, with all the usual disclaimers of "if you don't feel comfortable doing the work, then take it to someone", "cars can hurt you", "I'm not responsible for what you do with your car", "Only work on the car when it is securely supported by jack stands", "Wear eye protection", "Eat your cheerios" etc. Since I was doing some other work at the same time, I got the whole car off the ground & removed all the wheels first.
To remove the front struts, you need to support the end of the lower control arm & wheel hub so that they don't droop and damage the brake hose or pull the driveshaft out of the transmission. Next, remove the brake line and unbolt the wheel-speed-sensor wiring & clip from the bracket on the strut. Then, unscrew the sway bar link from it's bracket on the strut. This can be more challenging since you need to hold the stud with an allen key while unscrewing the outside nut with an open-ended wrench. Invariably these have become a bit rusted, so some penetrating oil like "P B Blaster" helps a lot.
At this point, since I was disassembling the strut assembly, I chose to loosen the main nut on the shock's shaft with the strut still solidly held in the chassis.
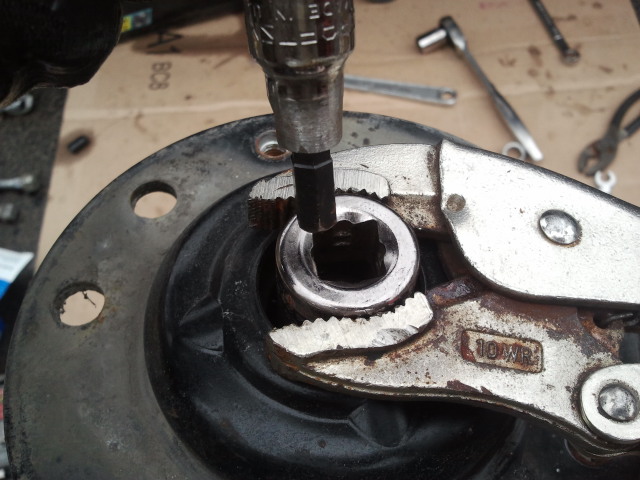
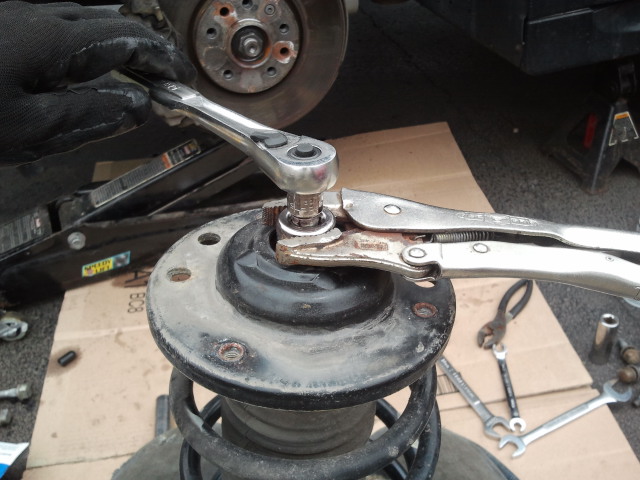
Only break it loose and maybe unscrew it one thread, since the spring is still compressed and can do a lot of damage if it's energy was released! This nut is the only thing holding the strut together! This is another case where you need to hold the shaft with an allen key & spin the nut, but since it's buried in the upper strut mount, a different solution must be used:


These were shot when the strut was already off the car, since I forgot to take pictures during disassembly. To make this possible, I was using a 1/2" drive socket for more room in the middle, and had to file down part of the allen key socket so that it would fit through the drive hole and spin freely.
Now with that nut loosened, remove the two 19mm nuts holding the strut to the wheel hub, and the three 12mm nuts holding the strut top mount to the chassis. With a little bit of persuasion, the strut assembly should now come right out! I used a couple zip-ties at this point between the brake line bracket on the chassis & the now-empty bolt holes for the strut on the wheel hub to keep the hub from flopping outwards and stressing the rubber brake line or pulling the driveshaft out of the transmission.
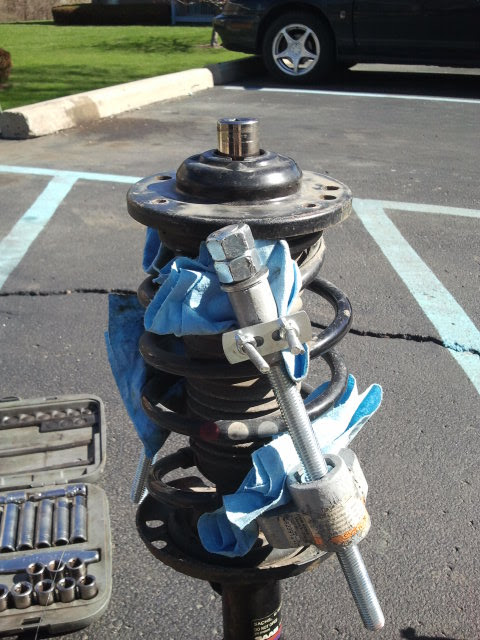
Now time for the spring compressors to keep the spring compressed and allow you to remove that nut from the top of the strut mount! Another disclaimer here: This is probably the most dangerous part of the job (besides jacking up & supporting the car), since if the spring slips, it can very easily launch unsecured pieces of the strut into your face, body, or the surroundings, sever your fingers, pull your hair and give you a wet willy. Inspect the spring compressors before using them for cracks, binding, or other signs of damage, make sure that they're securely on the spring 180 degrees apart to evenly compress it, and use those little hooks or bands to secure the compressor to the spring. Treat the compressed spring very gently, maybe with a nice walk on the beach with wine at sunset. I used some shop towels between the spring compressor & the spring to prevent scraping off paint on the spring, especially since our cars are known for binding & rusting springs (usually due to the strut-top bearing seizing).

Compress the spring evenly on both sides until the top mount is loose and you can freely rattle it and the bearing. Don't point either end of it at yourself, just in case! Remove the nut from the top as described above, lift off the top mount & bearing, and take the spring itself off of the shock (gently!). Disassembled, from left to right (and roughly top to bottom when assembled) is the shock assembly, the still-compressed spring (with it's rubber bottom-end protector on - always use rubber protection!), the dust boot (with rubber protection for the top-end of the spring), the bump-stop that rides on the shock's shaft, the top bearing, and the top mount.

A side-by-side comparison of the old shocks with the new - look at how much beefier the main shaft is on the Bilstein. This helps to contribute to it's stiffness, since side loads on the suspension put the shaft and the piston within the shock into bending. Overall, this will reduce the compliance in the front suspension.

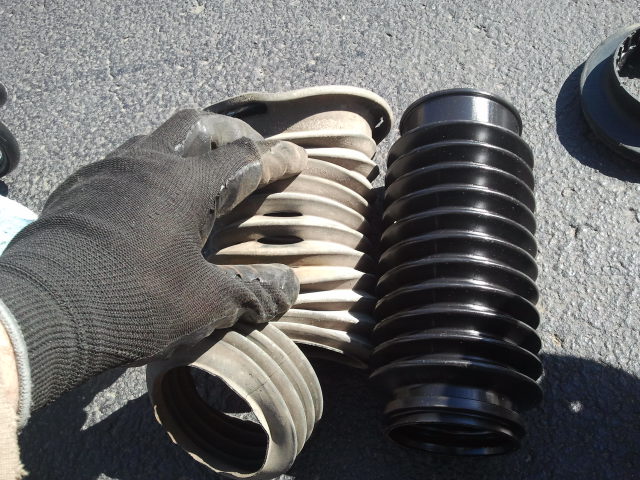
The much larger shaft means that the OEM bump stops or any replacements won't fit, but fortunately the Bilstein B6's have the bump-stop built into the shock internally, so external ones aren't necessary. However, the dust guard is still very important to keep debris off of the polished shaft where it would interfere with the shock's seal and ultimately it's reliability. Plus, the OEM one has the spring's top rubber isolator built in, so I wanted to keep it. Unfortunately, it wasn't long enough to cover the entire shaft on it's own (OEM had a ring to hold the bottom of the rubber accordian, but the Bilstein didn't), and had gotten some holes in it, so it needed some mending.

